Verana can be shaped around the way you work. This chapter covers the three ways of doing it: the custom mode positions on the Mode button, which store and recall whole camera states; the interface theme, which changes how the app looks; and launching from the lock screen, which decides how quickly you are in the camera at all.
23.1 Custom Modes
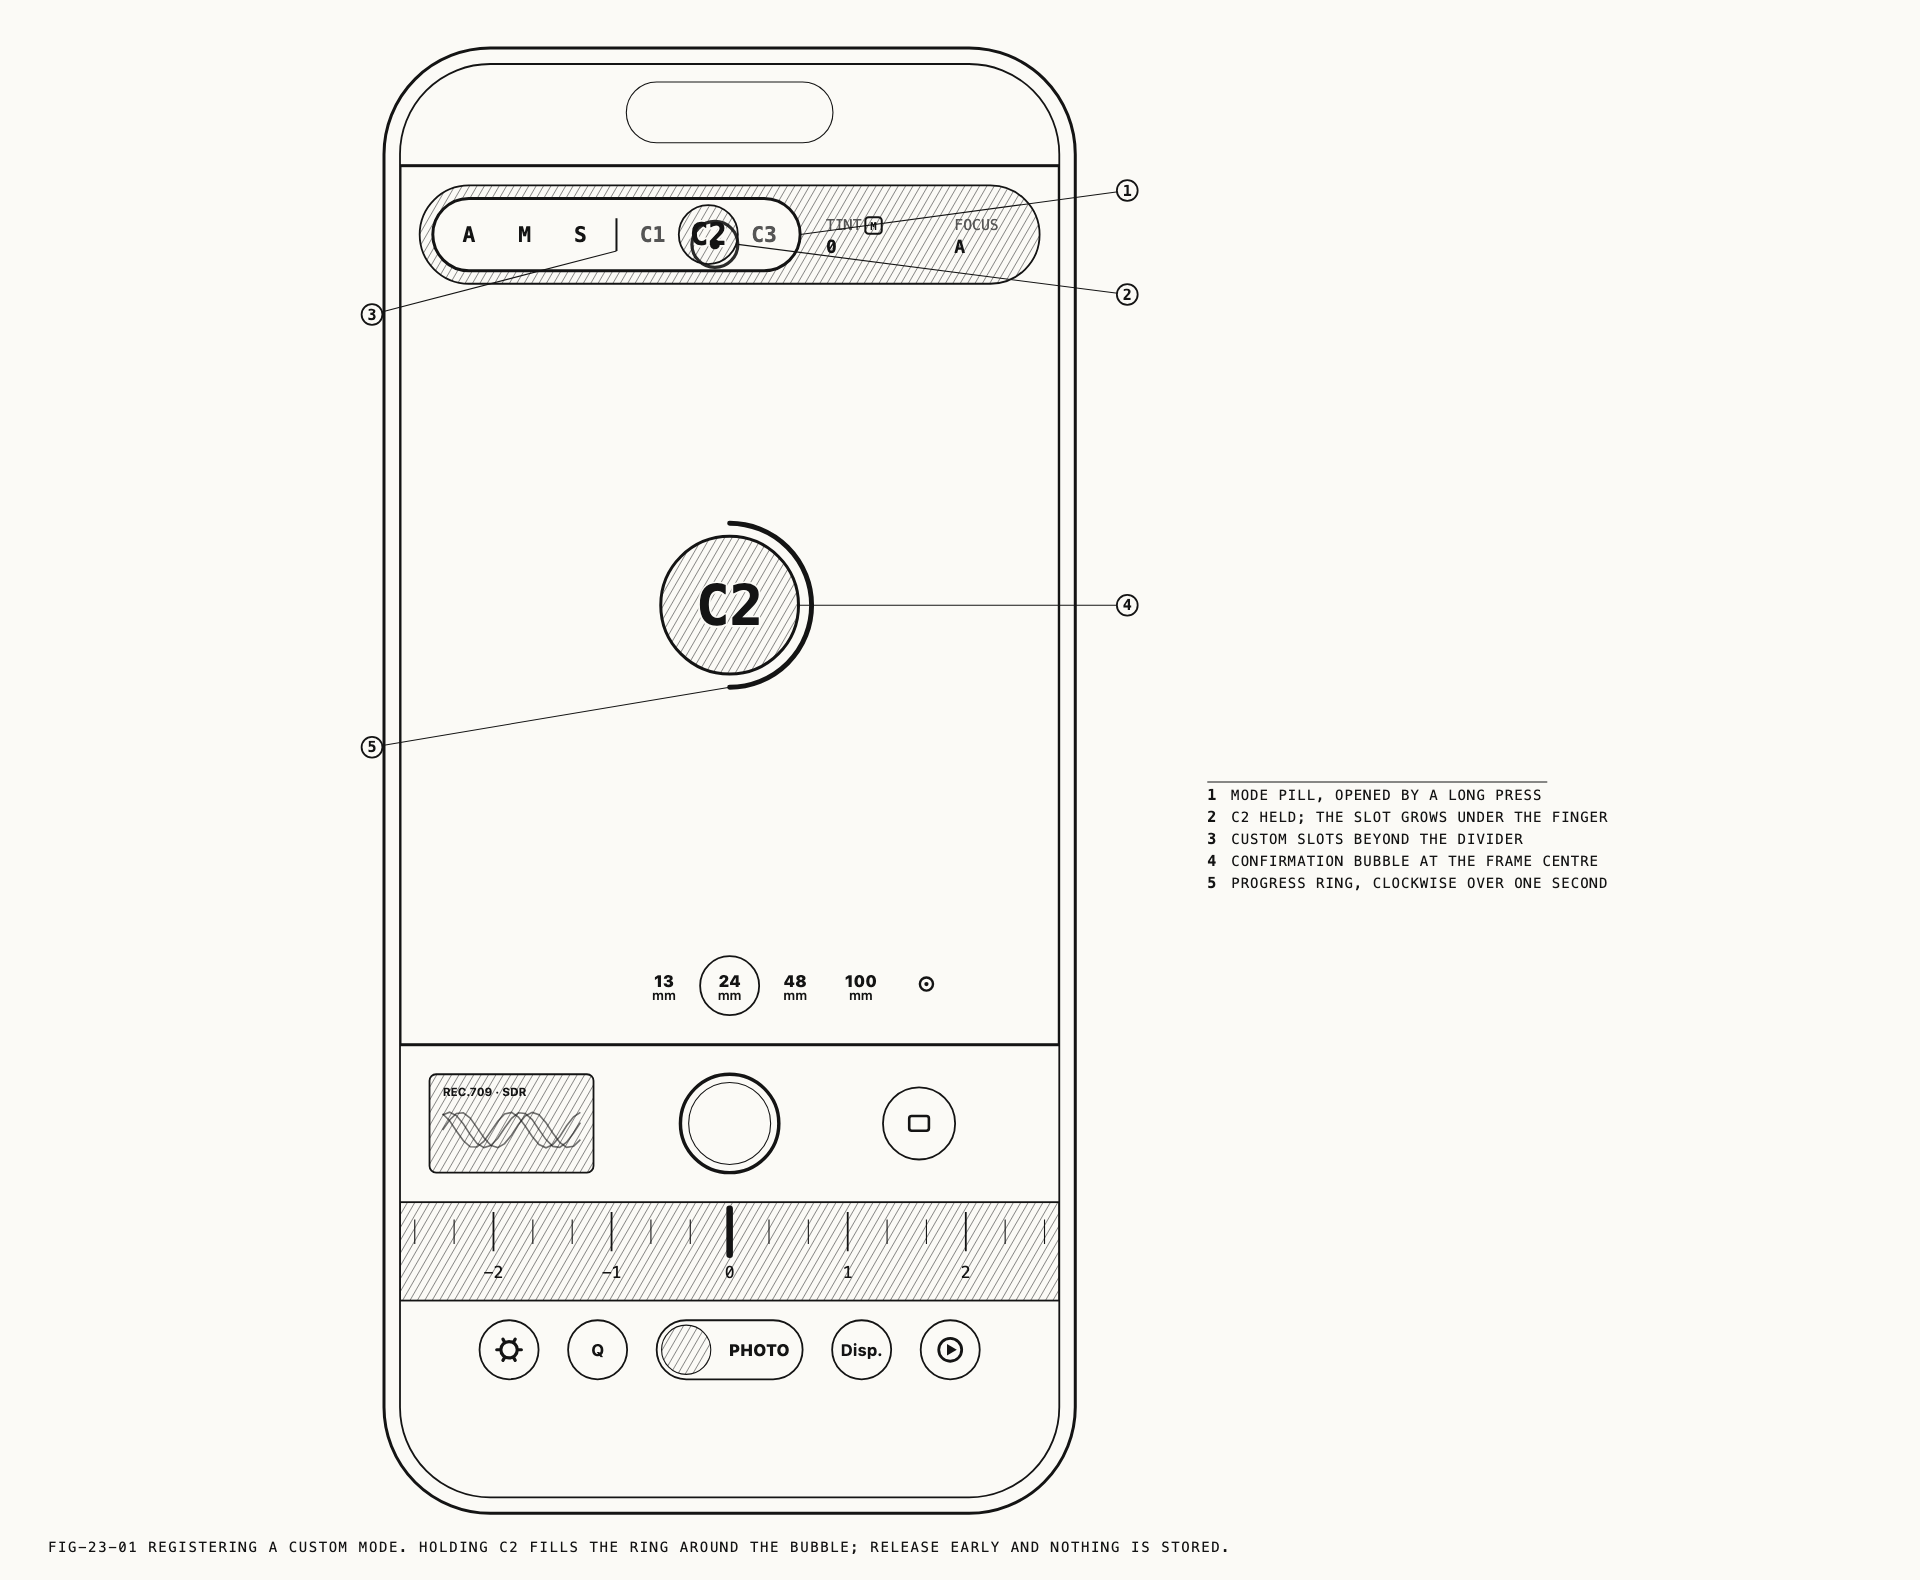
Press and hold the Mode button and the pill described in Chapter 3 expands with A, M
and S beside three custom positions, C1, C2 and C3. A custom position recalls a
complete camera state that you registered earlier.
A custom mode is a whole camera state, not a look on its own. It carries the exposure mode and its values, and also the capture format, the imaging settings including whatever look is active, the monitoring overlays and the drive mode, all together. Readers arriving from systems where a numbered slot on the mode dial holds a picture style should expect something considerably broader. A look on its own is a custom profile, which is a separate thing, has no limit of three, and is covered in Chapter 17.
Photo and video hold their own three positions. Registering C1 in video does not disturb
C1 in photo.
What a custom mode stores
Broadly, everything that decides how the next frame is captured and monitored:
- The exposure mode, sensitivity, shutter, exposure compensation, white balance, tint and manual focus position.
- The capture format: resolution, output and raw format for stills, and codec, compression, frame rate and stabilization for video.
- The imaging settings: the Color setting and whatever it opens, the selected log profile and its monitoring treatment, film emulation, film grain and halation, an attached LUT, a selected custom profile, border, and the output color space.
- Monitoring: grids, guides, level, aspect ratio, crop, false color, focus peaking, monitor color, image flips, anamorphic desqueeze, and the waveform in video.
- Focus preferences, the drive mode with its burst, timer and interval settings, the save
location, the
File Name Prefix, and your quick menu arrangements.
Four things are excluded. The lens and the zoom are never restored, so a recalled mode cannot move the camera off the framing you were holding. The video save destination stays as you set it, so a recalled mode cannot redirect a take to a drive that is not attached. The interface theme is not part of a mode, and neither are your account settings.
Registering a position
From the camera screen, press and hold the Mode button to open the pill, then press and
hold the position you want. A ring fills over about a second and a double pulse confirms
the store. Lifting your finger before the ring completes cancels it. An empty position
tapped rather than held answers with a HOLD TO STORE prompt.
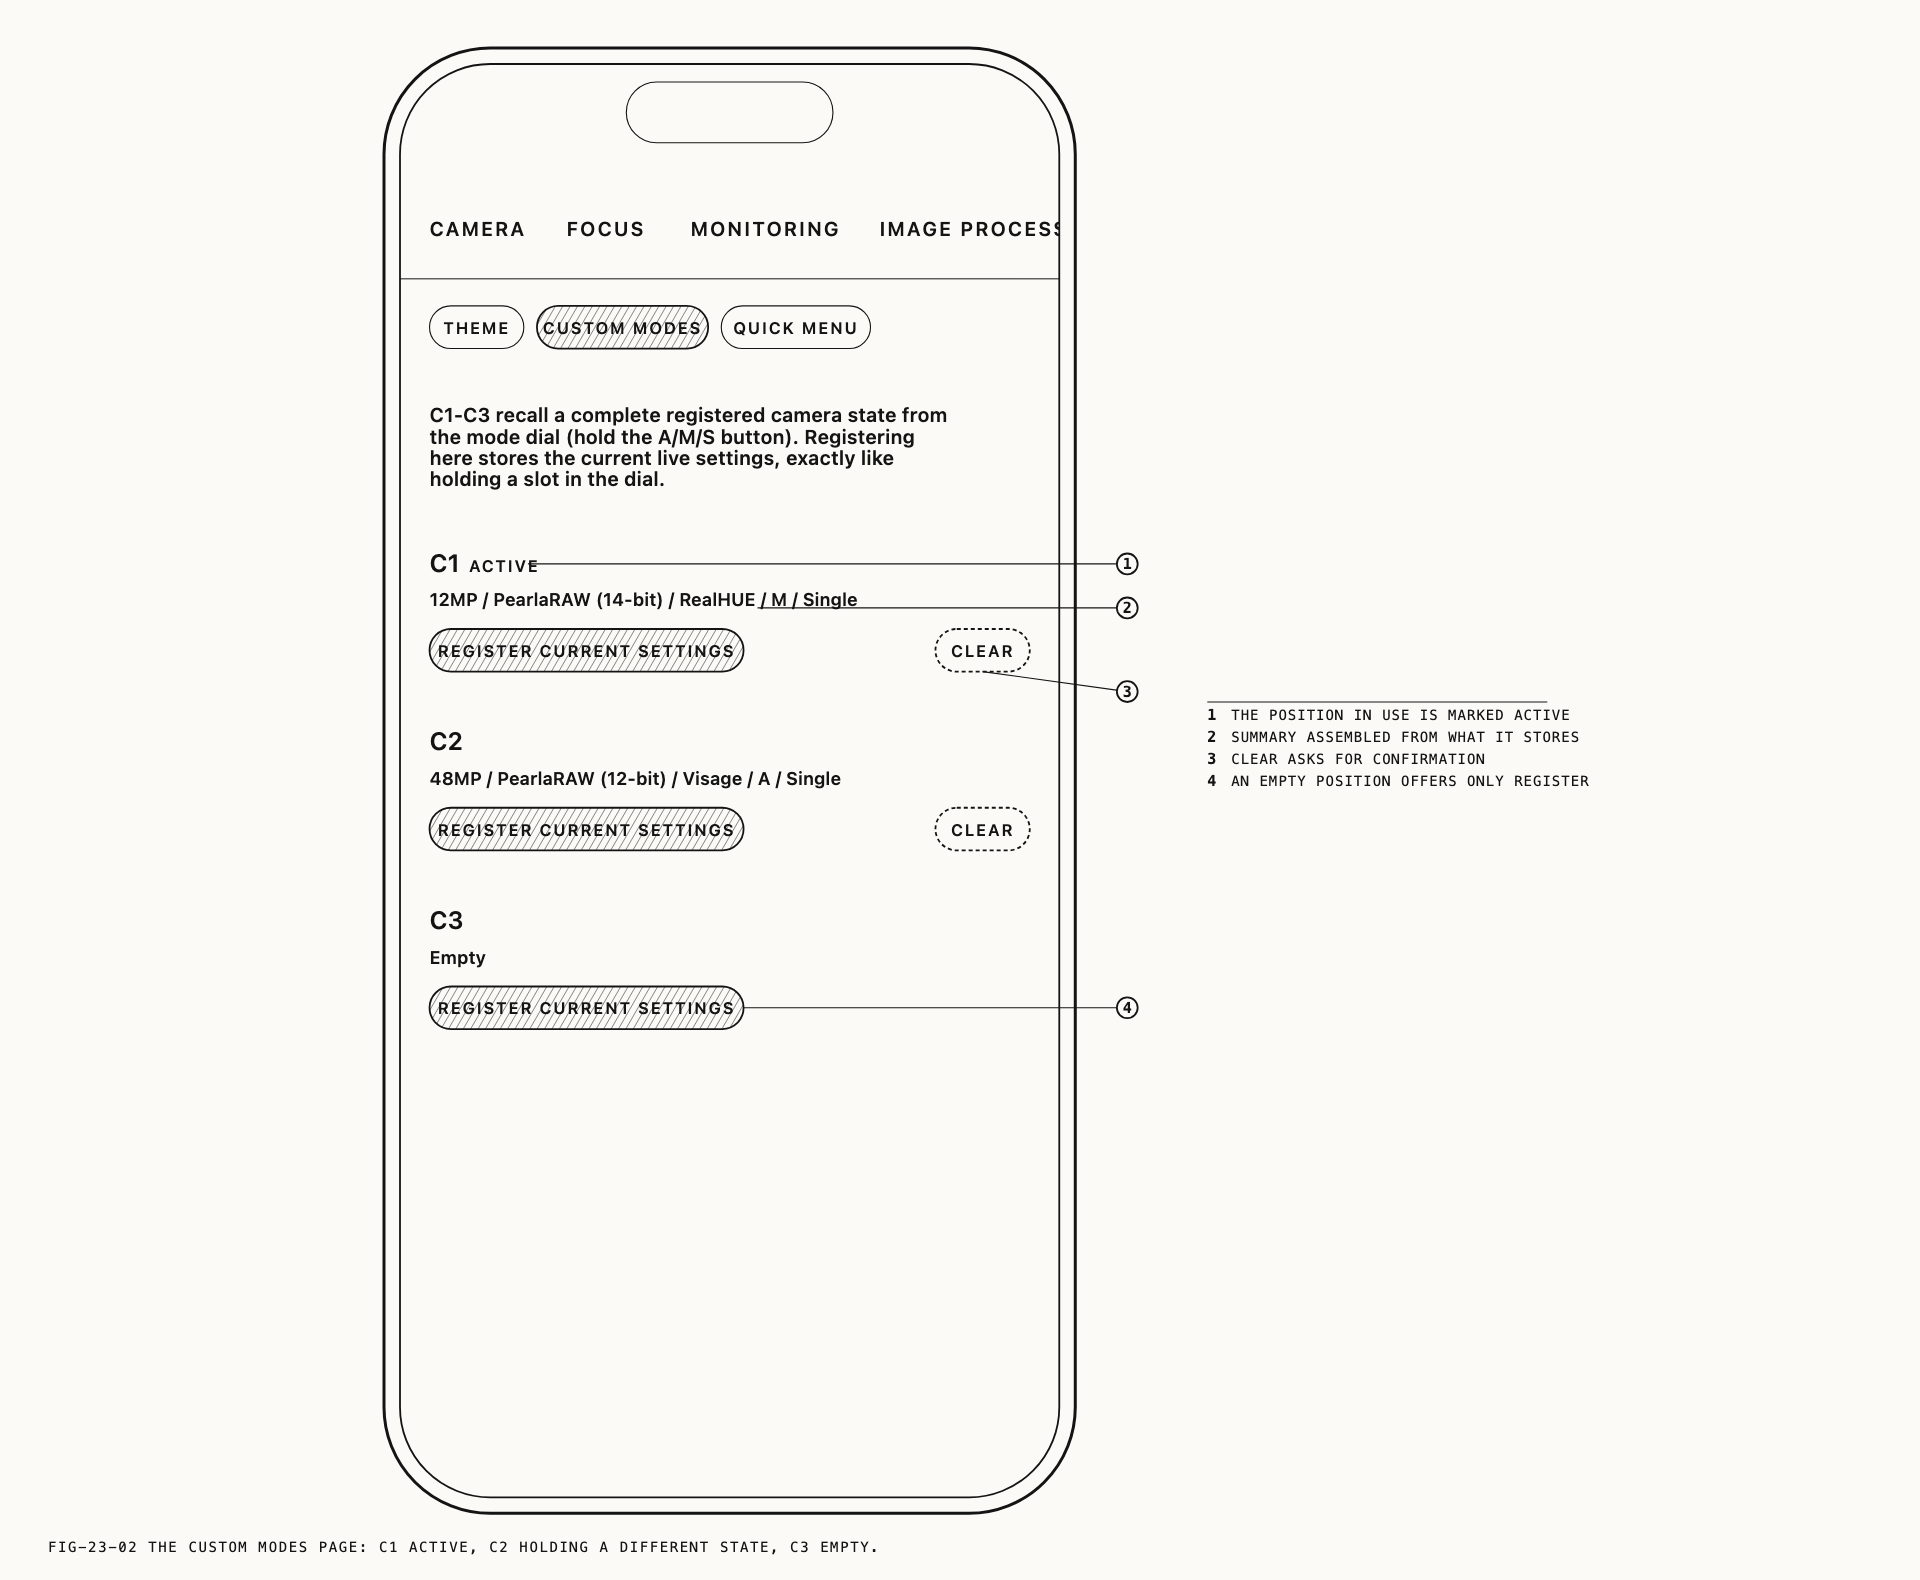
The same thing can be done from settings, where each position also reports what it holds.
Where to manage them: Settings → Customization → Custom Modes.
The page lists C1, C2 and C3 for the capture mode you are in. A position that holds
nothing reads Empty. A position that holds something describes itself in a line assembled
from what it stores, such as the format, the look and the exposure mode, so the positions
can be told apart without opening them. The one in use is marked ACTIVE.
REGISTER CURRENT SETTINGS stores the camera’s current state into that position, exactly
as holding the position on the pill does.
Registering overwrites the whole position. It never merges with what was there.
Recalling, drifting and stepping back out
Selecting a position applies everything it holds and the Mode button’s face changes to
C1, C2 or C3. The toolbar keeps behaving according to the exposure mode inside the
position, so a mode registered in Manual shows the Manual tools while the button reads
C2.
Settings changed after a recall take effect and are not written back into the position. The camera does what you tell it, and the position keeps what you registered. Selecting the position you are already in discards those changes and returns to the registered state.
Entering a custom position from A, M or S sets aside the setup you were working in.
Selecting A, M or S again brings it back, so a custom mode can be tried and left
without losing your place. Moving from one custom position directly to another leaves that
held setup untouched.
Switching between photo and video steps out of any custom position and restores the held setup for each, with the Mode button back on a letter. A custom position is only ever entered by selecting it.
Closing and reopening the app restores the camera exactly as you left it, including any changes made after a recall. Nothing is re-applied at launch.
Note: Custom positions are inert while a recording, a burst, or an interval or calibration run is in progress. Reconfiguring the camera mid capture would cost the take. They become available again as soon as the capture ends.
A recall that cannot reproduce something says so rather than passing over it. If the registered format is not available under the current conditions, if a stored value falls outside the range the active format allows, or if a LUT, custom profile or interval program it refers to is no longer in the library, a notice reports what was used instead. The registered position is not rewritten, so restoring a missing item makes the position whole again.
Clearing a position
CLEAR appears beside REGISTER CURRENT SETTINGS on a position that holds something, and
asks for confirmation. Clearing deletes what was stored and leaves the camera’s current
settings alone. If the position being cleared was the active one, the Mode button returns
to a letter without changing the camera.
23.2 Themes
The interface theme sets the accent color Verana uses throughout the app, and the family of grays behind it.
Where to change it: Settings → Customization → Theme.
Interface offers three themes.
| Theme | Accent |
|---|---|
Default | The blue Verana ships with |
Deep Amethyst | Violet |
Old Gold | Warm gold |
A theme reaches the settings screens, the camera chrome, the button strokes and glyphs, the dial’s ticks and the panels that open over the viewfinder. It changes nothing about the image: the viewfinder, the recorded file and every processing setting are unaffected. The change takes effect the moment you make it, across the whole interface, with no relaunch needed.
The theme is a preference of the app rather than of the camera, which is why a custom mode does not carry it. Recalling a mode never changes how the app looks.
23.3 Launching From the Lock Screen
Verana can be opened from the lock screen and from Control Center, including while the device is still locked.
Launched from a locked device, Verana appears immediately with its own chrome while the system authenticates you, then continues into the camera. If authentication is dismissed, a prompt to unlock appears and a tap tries again. The camera is live once the app is open, and nothing is captured before then.
The app always lands on the camera on this route, even if it was last left on the monitor role described in Chapter 21.