Everything that decides what a still capture is, and what lands on disk when you press the shutter, is set on one page. This chapter covers the drive modes at the level a photographer needs before choosing between them, the self-timer, flash, the format settings, resolution, color space, and where a finished photo is saved.
Two of these settings talk to each other more than the rest. The raw format and the resolution constrain one another, and the raw format also decides how zoom behaves at the moment of capture. Both interactions are described below, because a photographer who does not know about them will read the result as a fault.
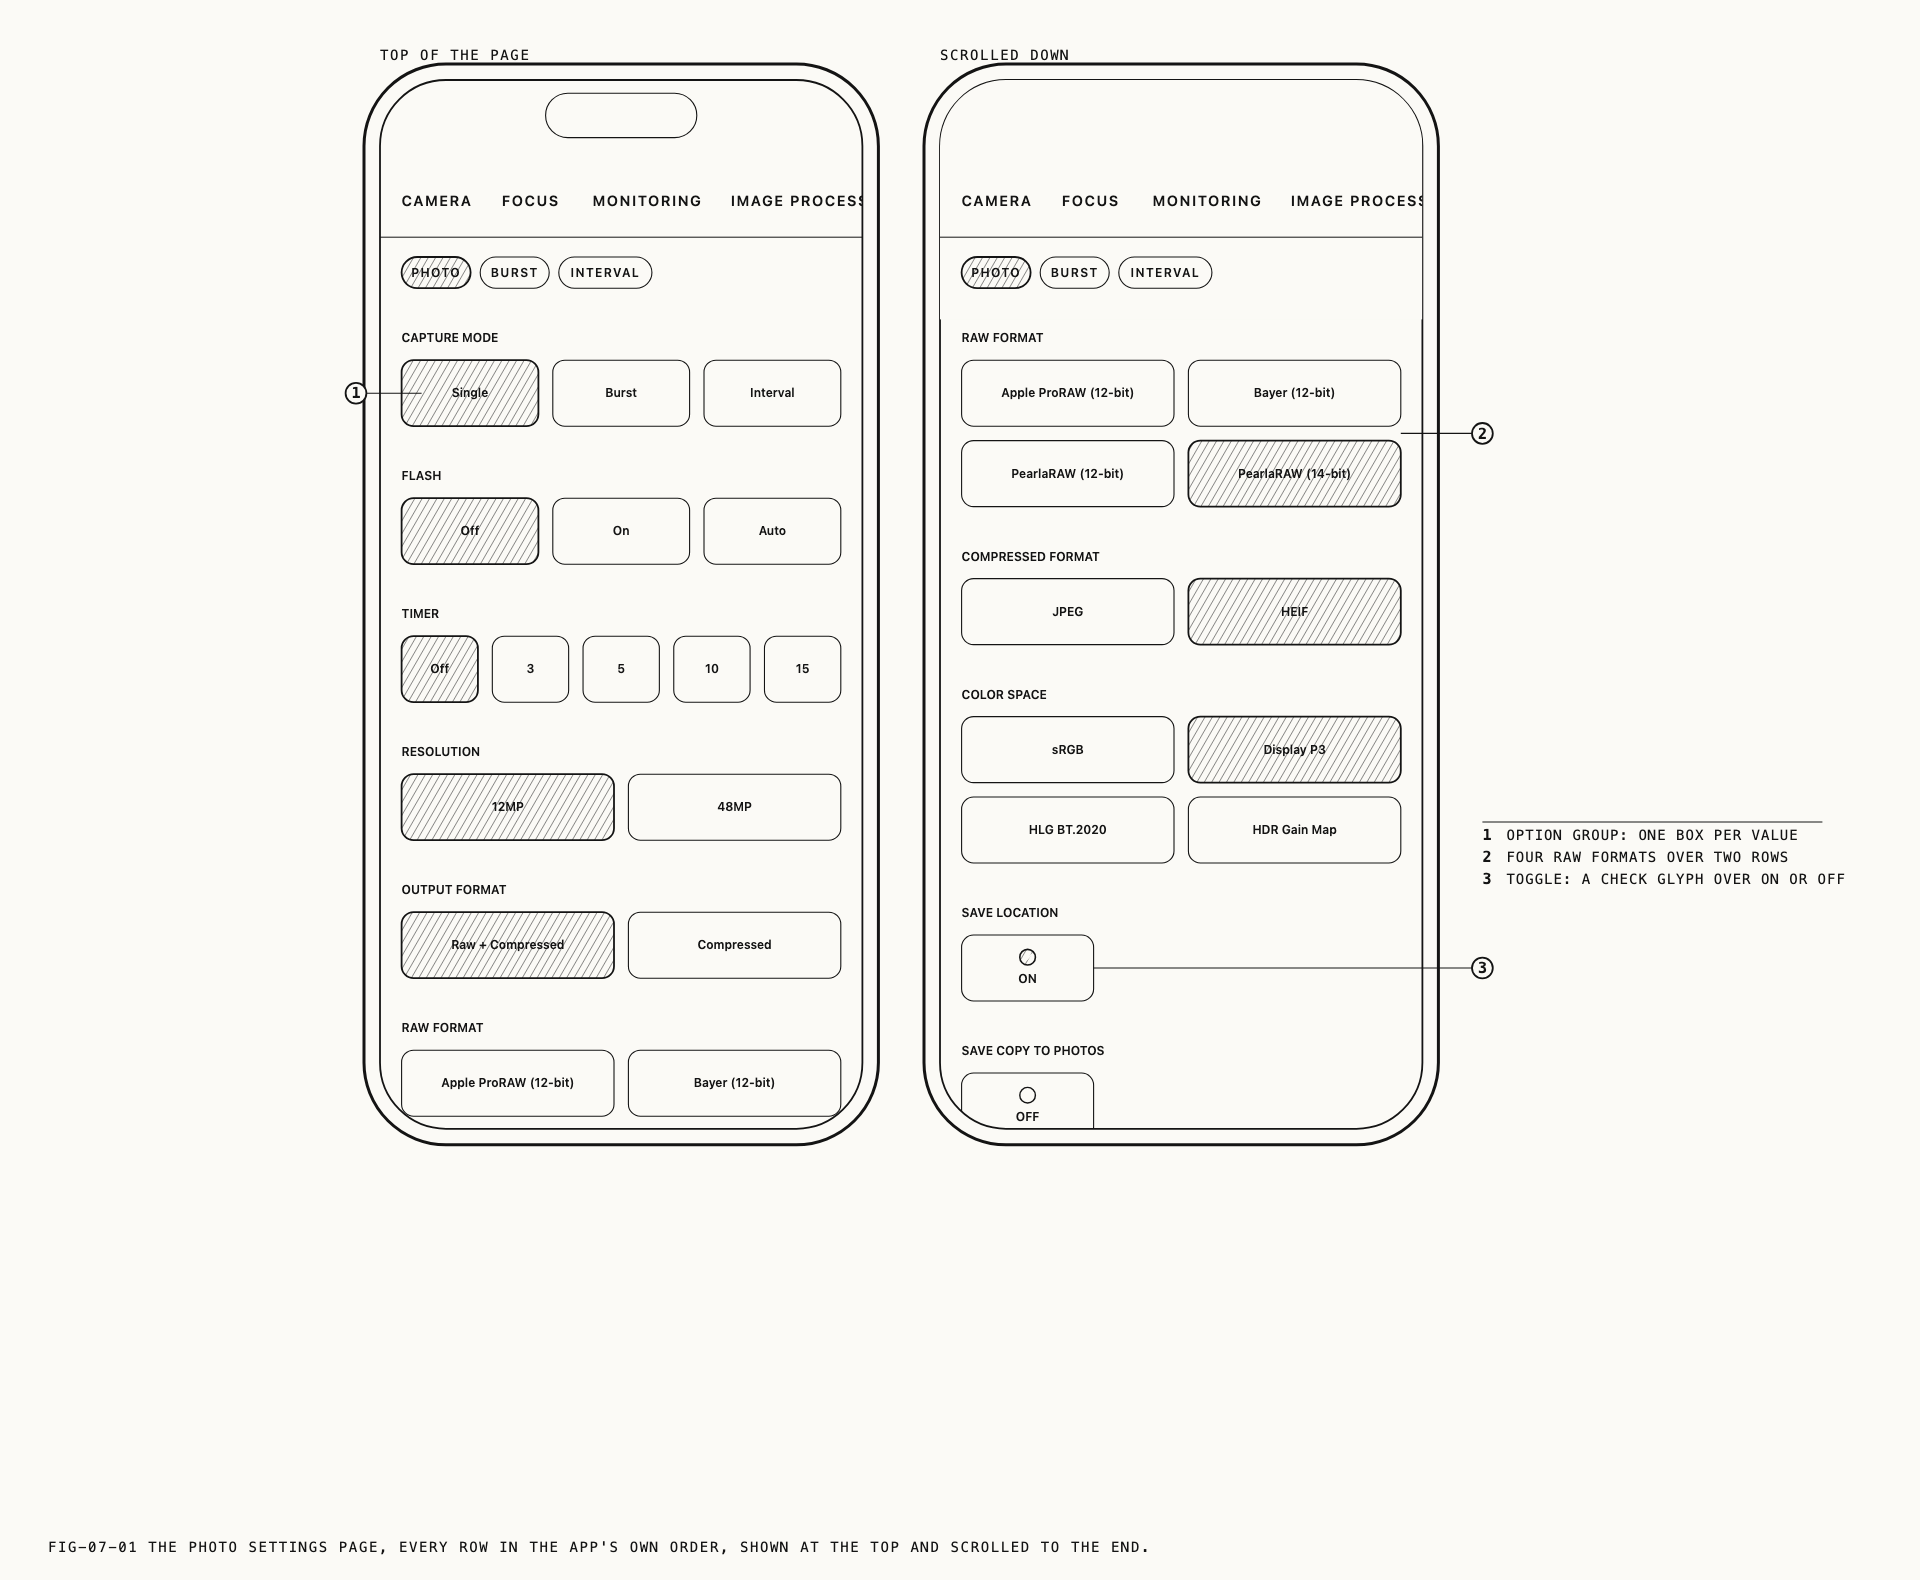
7.1 Drive Modes
Photo capture has three drive modes: Single, Burst and Interval. Single takes one
frame per shutter press. Burst runs frames for as long as the shutter is held. Interval
runs a program of captures at a fixed spacing.
Where to change it: Settings → Camera → Photo, under Capture Mode.
The same three positions sit on the drive mode selector beside the shutter button, which is the faster route while shooting. Each drive mode keeps its own settings and its own quick menu arrangement, so a change made in burst does not follow you back into single frames.
Burst is covered in Chapter 8 and the intervalometer in Chapter 9. The rest of this chapter applies to all three.
7.2 The Self-Timer
The timer delays a capture by 3, 5, 10 or 15 seconds. Off disables it.
Where to change it: Settings → Camera → Photo, under Timer.
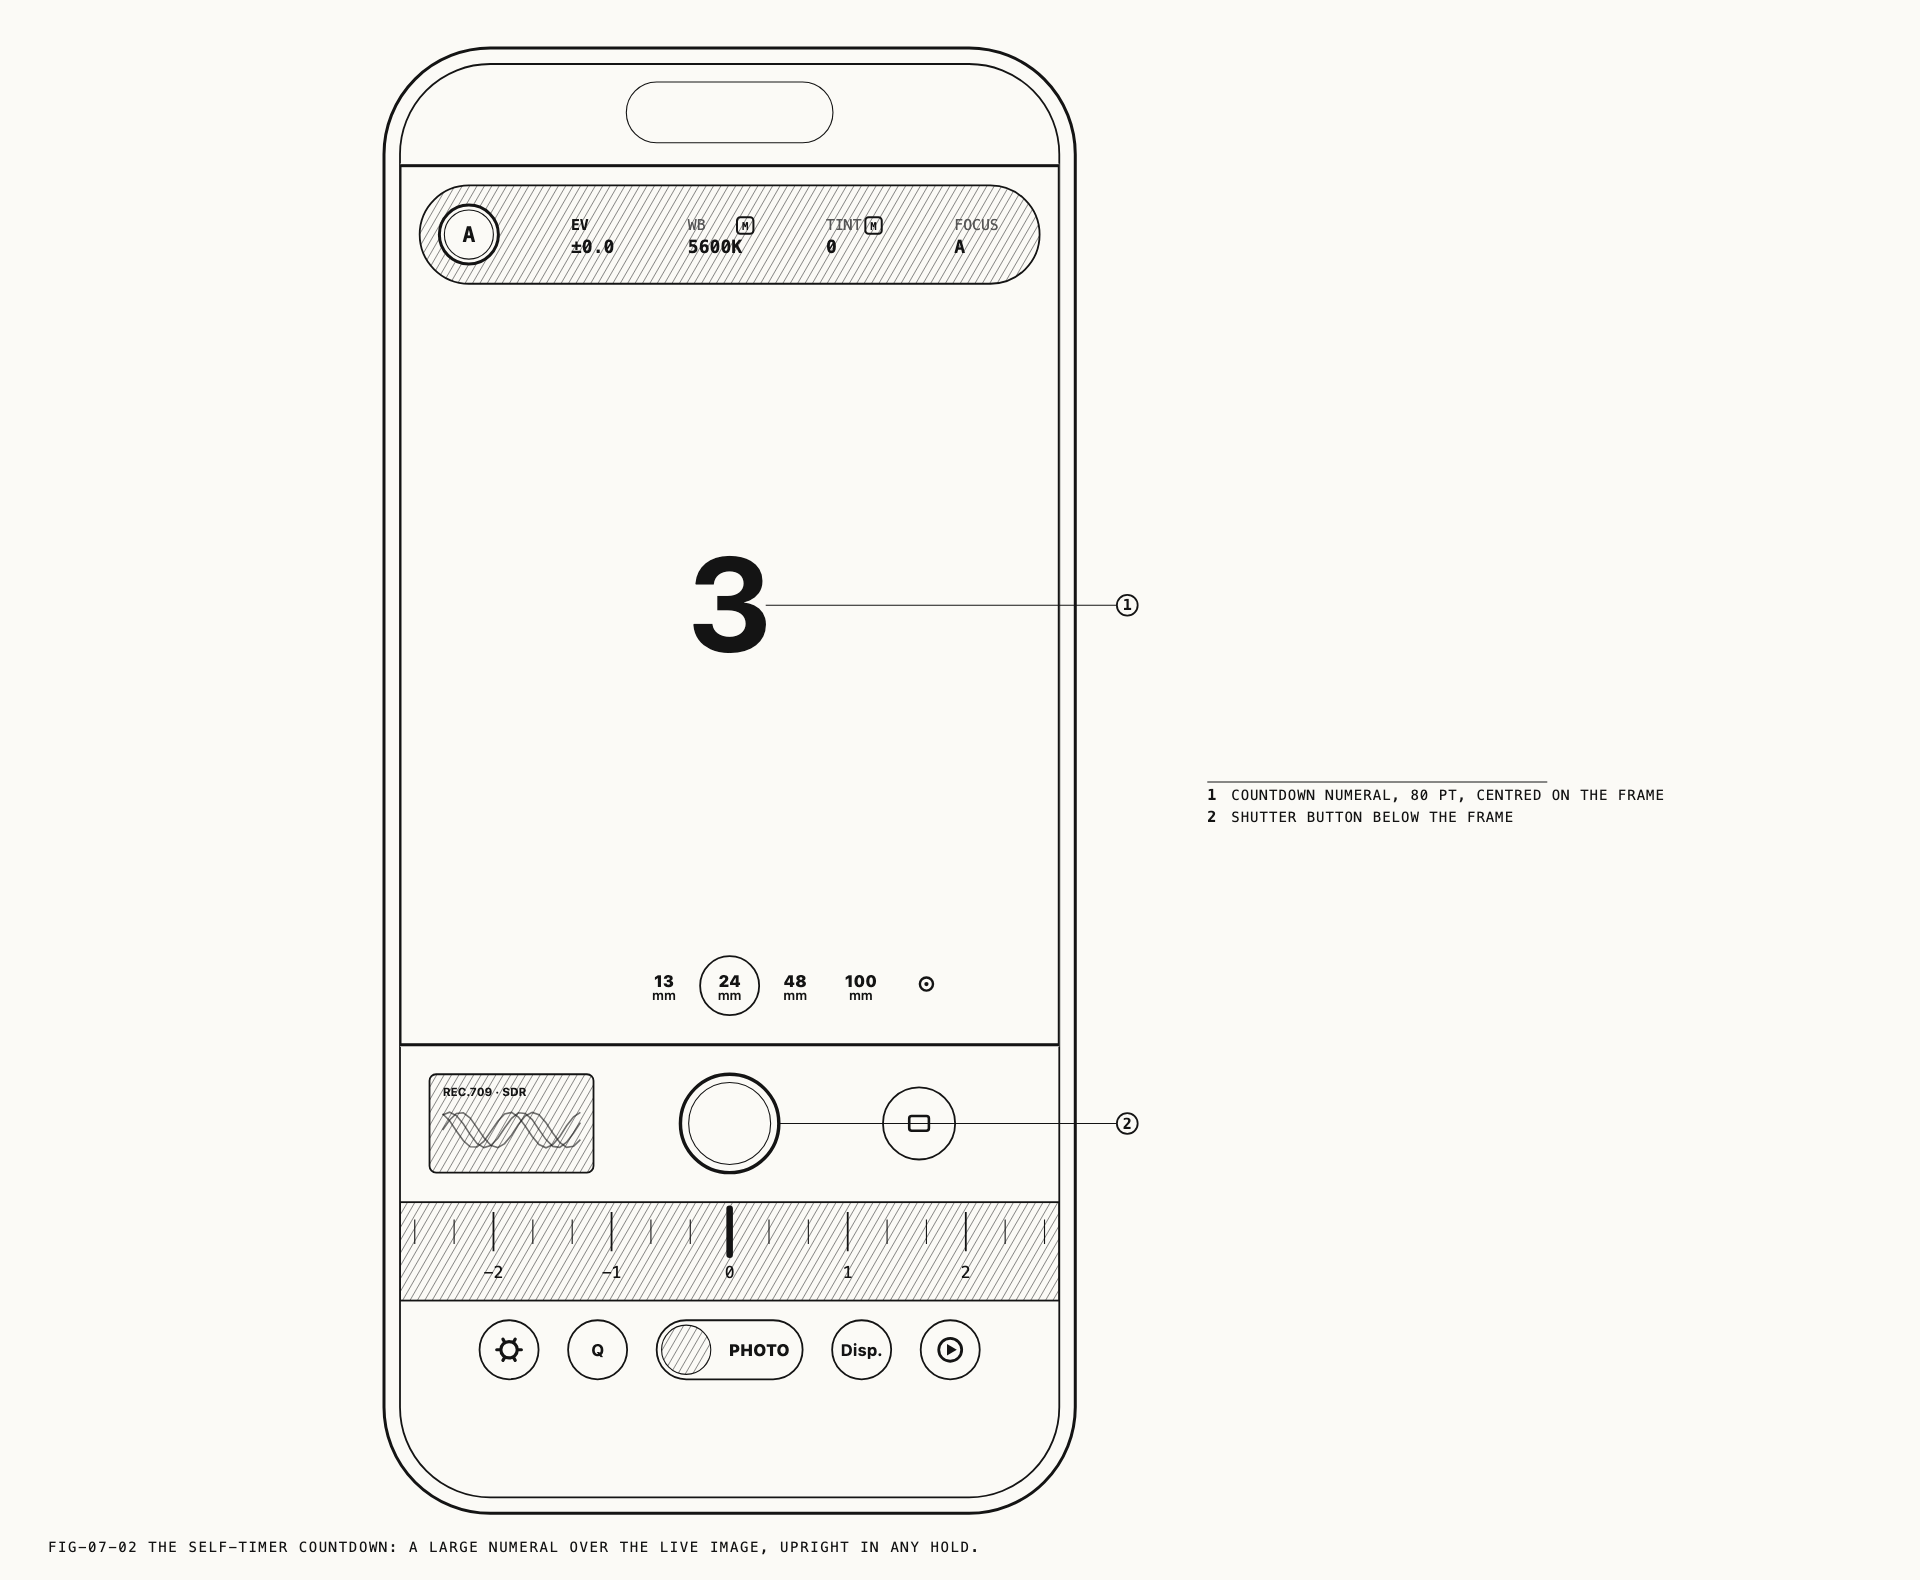
Unlike most cameras, the self-timer is not a drive mode in Verana. It is a delay set
separately, so choosing one does not take you out of single frames and setting the timer to
Off does not put you back into a mode. Nothing on the drive mode selector changes when
you arm it.
Note: The timer applies to single frames only. It has no effect in burst or in an interval sequence, both of which begin as soon as you start them.
While the countdown runs, the remaining seconds are drawn large at the center of the viewfinder. The number stays upright however the phone is held, so it can be read from in front of the camera as well as behind it. In the final seconds the rear light pulses briefly once a second, which gives a subject standing away from the phone something to count against. Tapping the shutter button during the countdown cancels the capture.
7.3 Flash
Flash has three settings: Off, On and Auto. Off never fires, On fires on every
frame, and Auto leaves the decision to the camera based on the light it meters.
Where to change it: Settings → Camera → Photo, under Flash.
Flash applies to the camera in use. Lenses with no flash available ignore the setting.
Flash fires with Apple ProRAW (12-bit) and PearlaRAW (12-bit). With Bayer (12-bit)
or PearlaRAW (14-bit) selected, the flash does not fire, whatever the setting reads.
Raw formats are described in section 7.5.
7.4 Output Format
Output Format decides whether a capture produces a raw file.
| Option | Result |
|---|---|
Raw + Compressed | Raw and compressed images, both from the same frame |
Compressed | A compressed image only |
Where to change it: Settings → Camera → Photo, under Output Format.
How many files that produces depends on the raw format. PearlaRAW (12-bit) and
PearlaRAW (14-bit) write one file, with the compressed image carried inside it. The
two DNG formats, Apple ProRAW (12-bit) and Bayer (12-bit), write two: the DNG and
a separate compressed file alongside it. Either way you have both images, and the library
shows one capture.
In Raw + Compressed, the compressed image carries the color treatment that was active at
capture and matches what the viewfinder showed. The raw image is the master. It is kept
clean, and the look you were shooting with is applied to it when you open it in Revela
Lite, so a raw capture stays open to reinterpretation. Chapter 19 covers that.
Raw Format is only available while Raw + Compressed is selected. In Compressed it is
grayed out, since no raw file is being written.
7.5 Raw Format
Four raw formats are offered.
| Format | Purpose |
|---|---|
Apple ProRAW (12-bit) | Apple’s own raw format, opened by anything that reads ProRAW |
Bayer (12-bit) | An unprocessed raw file in DNG form, readable by any raw converter |
PearlaRAW (12-bit) | Pearla’s raw format, for the Pearla and Revela workflow |
PearlaRAW (14-bit) | Pearla’s raw format at the greatest depth Verana captures |
Where to change it: Settings → Camera → Photo, under Raw Format.
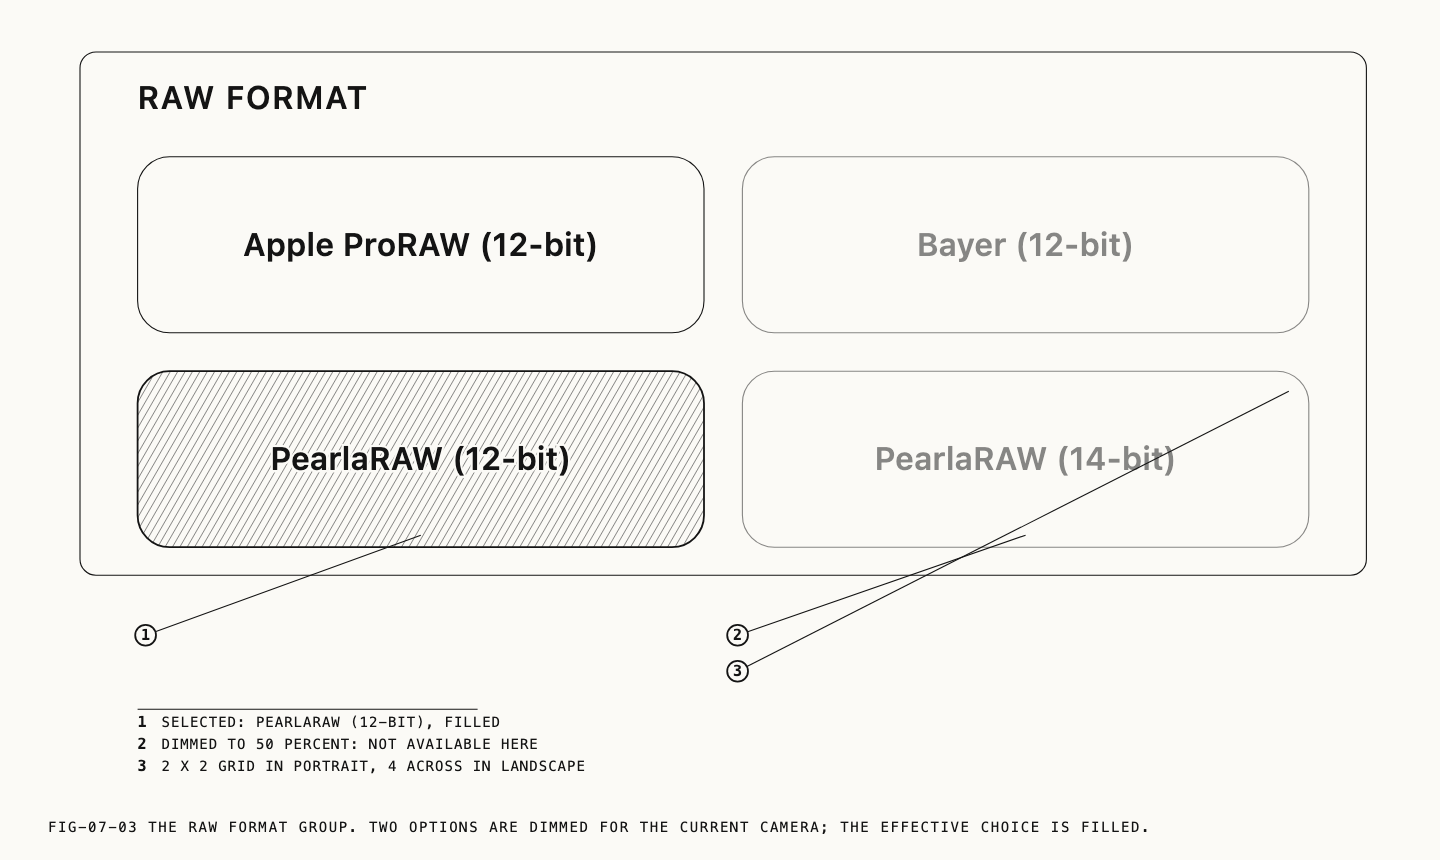
Which formats a device offers depends on the camera in use. Formats that are unavailable are grayed out rather than hidden, and the selection shown is always the format Verana will use. Your stored preference is kept, so a format that is unavailable on one camera comes back when you switch to a camera that supports it. Two of the four are also unavailable at 48MP, as described in section 7.7.
7.6 Compressed Format
Compressed Format chooses between JPEG and HEIF. HEIF produces smaller files at
higher quality and is required for the two HDR color spaces. JPEG is the more widely
compatible of the two and is the safer choice when a file is going somewhere you do not
control.
Where to change it: Settings → Camera → Photo, under Compressed Format.
7.7 Resolution
Resolution offers 12MP and 48MP.
Where to change it: Settings → Camera → Photo, under Resolution.
48MP capture depends on the device and the lens. Where it is not available the control is
grayed out and reads 12MP, which is what Verana will shoot.
Note: 48MP is available with Apple ProRAW (12-bit) and PearlaRAW (12-bit).
Bayer (12-bit) and PearlaRAW (14-bit) are unavailable while 48MP is selected. If one
of them was selected when you choose 48MP, the raw format moves to PearlaRAW (12-bit)
and stays there.
7.8 Zoom and Raw Format
With Bayer (12-bit) or PearlaRAW (14-bit), a zoomed shot records the full frame and
keeps your framing with it. Nothing stops you shooting zoomed on either of them, and it
does not cost you the frame you composed.
The file opens to the view you framed, so what you see first is the photograph you took, and the wider frame stays available if you later want it. The compressed file that accompanies the capture has your framing applied, so it matches the viewfinder exactly.
The viewfinder widens for the moment of capture and returns to your framing as soon as the shot is taken.
Apple ProRAW (12-bit) and PearlaRAW (12-bit) are unaffected. They capture at the focal
length you set, and nothing outside the frame is retained.
7.9 Color Space
Color Space sets the space a finished photo is delivered in: sRGB, Display P3,
HLG BT.2020 or HDR Gain Map.
Where to change it: Settings → Camera → Photo, under Color Space.
The two HDR spaces, HLG BT.2020 and HDR Gain Map, require HEIF. While JPEG is
selected they are grayed out, and switching to JPEG with one of them active returns the
setting to sRGB. Choosing between the four is covered in Chapter 14.
7.10 Saving
Two switches govern what a finished photo carries and where a copy of it goes.
Save Location records the place a photo was taken into the file. It needs permission to
use your location, and until that is granted the switch is unavailable and reads off.
Tapping it in that state asks for permission, or opens iOS Settings if permission was
refused earlier. Your own setting is preserved either way, so granting access later
restores it rather than resetting it.
Save Copy to Photos writes an additional copy of every capture to the iOS Photos
library. It is off by default. Every capture is saved to Verana’s own media library
regardless of this setting, so turning it on adds a copy rather than choosing a
destination. The media library is covered in Chapter 18.
Where to change them: Settings → Camera → Photo.
Several of these settings can also be placed in the quick menu behind the Q button, which is the faster route to them while shooting. Building the quick menu is covered in Chapter 22.