Verana handles color in two layers. RealHUE sits underneath, calibrating the device itself, and is present in everything the camera produces. The Color setting sits on top and selects which treatment is built on that foundation.
Color is the switch the rest of Part III depends on. It determines what the viewfinder shows, what is recorded, and which of the Image Processing pages can be configured. The Film Emulation and Log pages offer their controls only when Color is set to match them, so a reader who arrives at either page first finds it inactive.
13.1 The Color Setting
Color offers three values.
Where to change it: Settings → Image Processing → Process.
| Value | What Verana produces | What it opens |
|---|---|---|
RealHUE | The calibrated image with nothing further applied | Nothing further to configure |
Film Emulation | A film profile applied at capture | The Film Emulation page, where the profile is chosen. Chapter 16 |
Log | A log encoding, for grading afterwards | The Log page, where the profile and the monitoring method are chosen. Chapter 15 |
One value is active at a time. The choice is held separately for photo and for video, because the settings screen follows the active capture mode, so setting Color while in photo mode leaves the video setting as it was. Someone who shoots stills in one treatment and video in another therefore does not have to change the setting when switching modes.
Pages that depend on Color state their condition in place of their controls rather than presenting settings that would do nothing.
| Page | Notice shown while Color is set elsewhere |
|---|---|
| Film Emulation | SET COLOR TO FILM EMULATION TO ENABLE |
| Log | SET COLOR TO LOG TO ENABLE |
| LUTs | SET COLOR TO LOG AND MONITORING TO LUT TO ENABLE |
The Film Texture and Custom Profiles pages do not depend on Color and remain available whichever value is set. Film Texture is covered in Chapter 16, LUTs and custom profiles in Chapter 17.
13.2 When a Profile Holds the Setting
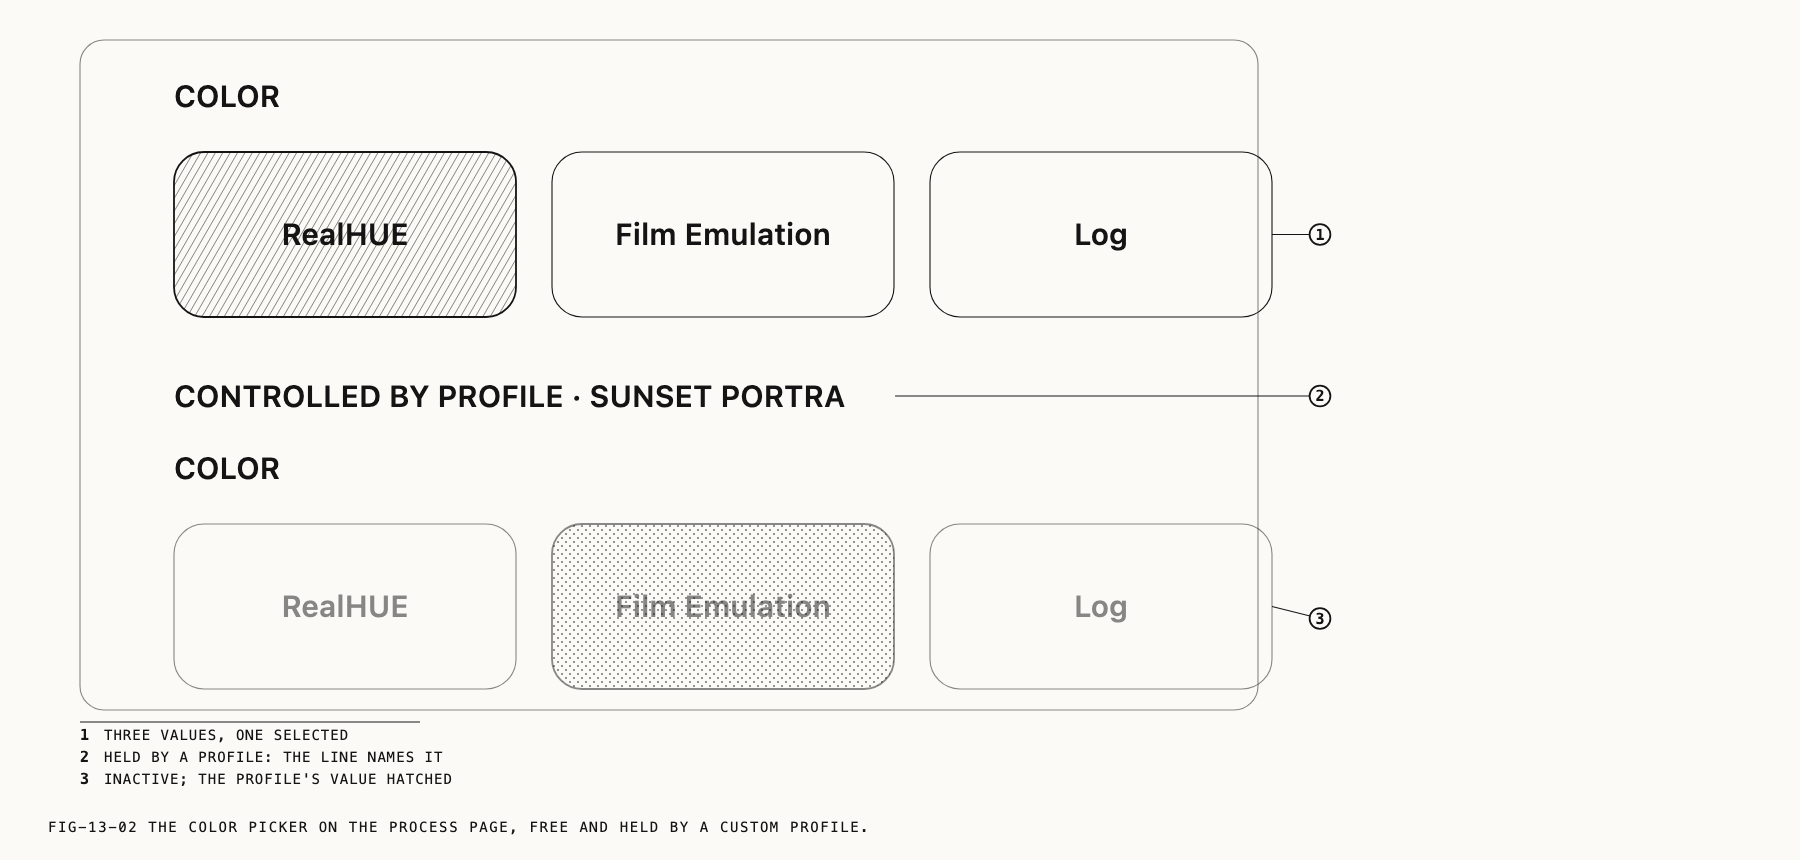
A saved custom profile carries a complete color setup, and while one is active it holds
the Color setting rather than leaving it to you. The picker on the Process page becomes
inactive, displays the value the profile is using, and carries a line above it reading
CONTROLLED BY PROFILE followed by the profile’s name.
This is the usual reason for finding Color unresponsive. Selecting None on the Custom
Profiles page ends the override and returns the setting to your own control.
Where to change it: Settings → Image Processing → Custom Profiles.
Building and managing profiles is covered in Chapter 17.
13.3 RealHUE
RealHUE is Pearla’s color calibration system. It is hardware specific: supported iPhones are measured across their lenses and under several lighting conditions, so color is consistent from one camera module to the next and from one device to another.
RealHUE is a calibration layer rather than a look. It introduces no contrast curve, no saturation bias and no creative interpretation. What it provides is a neutral, accurate starting point, which is what makes everything built above it repeatable: the same film profile, the same LUT or the same grade behaves the same way on a wide shot as on a telephoto shot, and on your phone as on the next one.
It remains active beneath every value of the Color setting, including Log. Selecting
RealHUE as the Color value means only that nothing further is applied on top. That is
the setting for work where accuracy matters most: product photography, reference frames,
copy work, and anything that will be matched to another camera.
RealHUE requires no configuration and has no controls of its own. The one thing it can be given is a measurement of your particular device.
13.4 Device Calibration
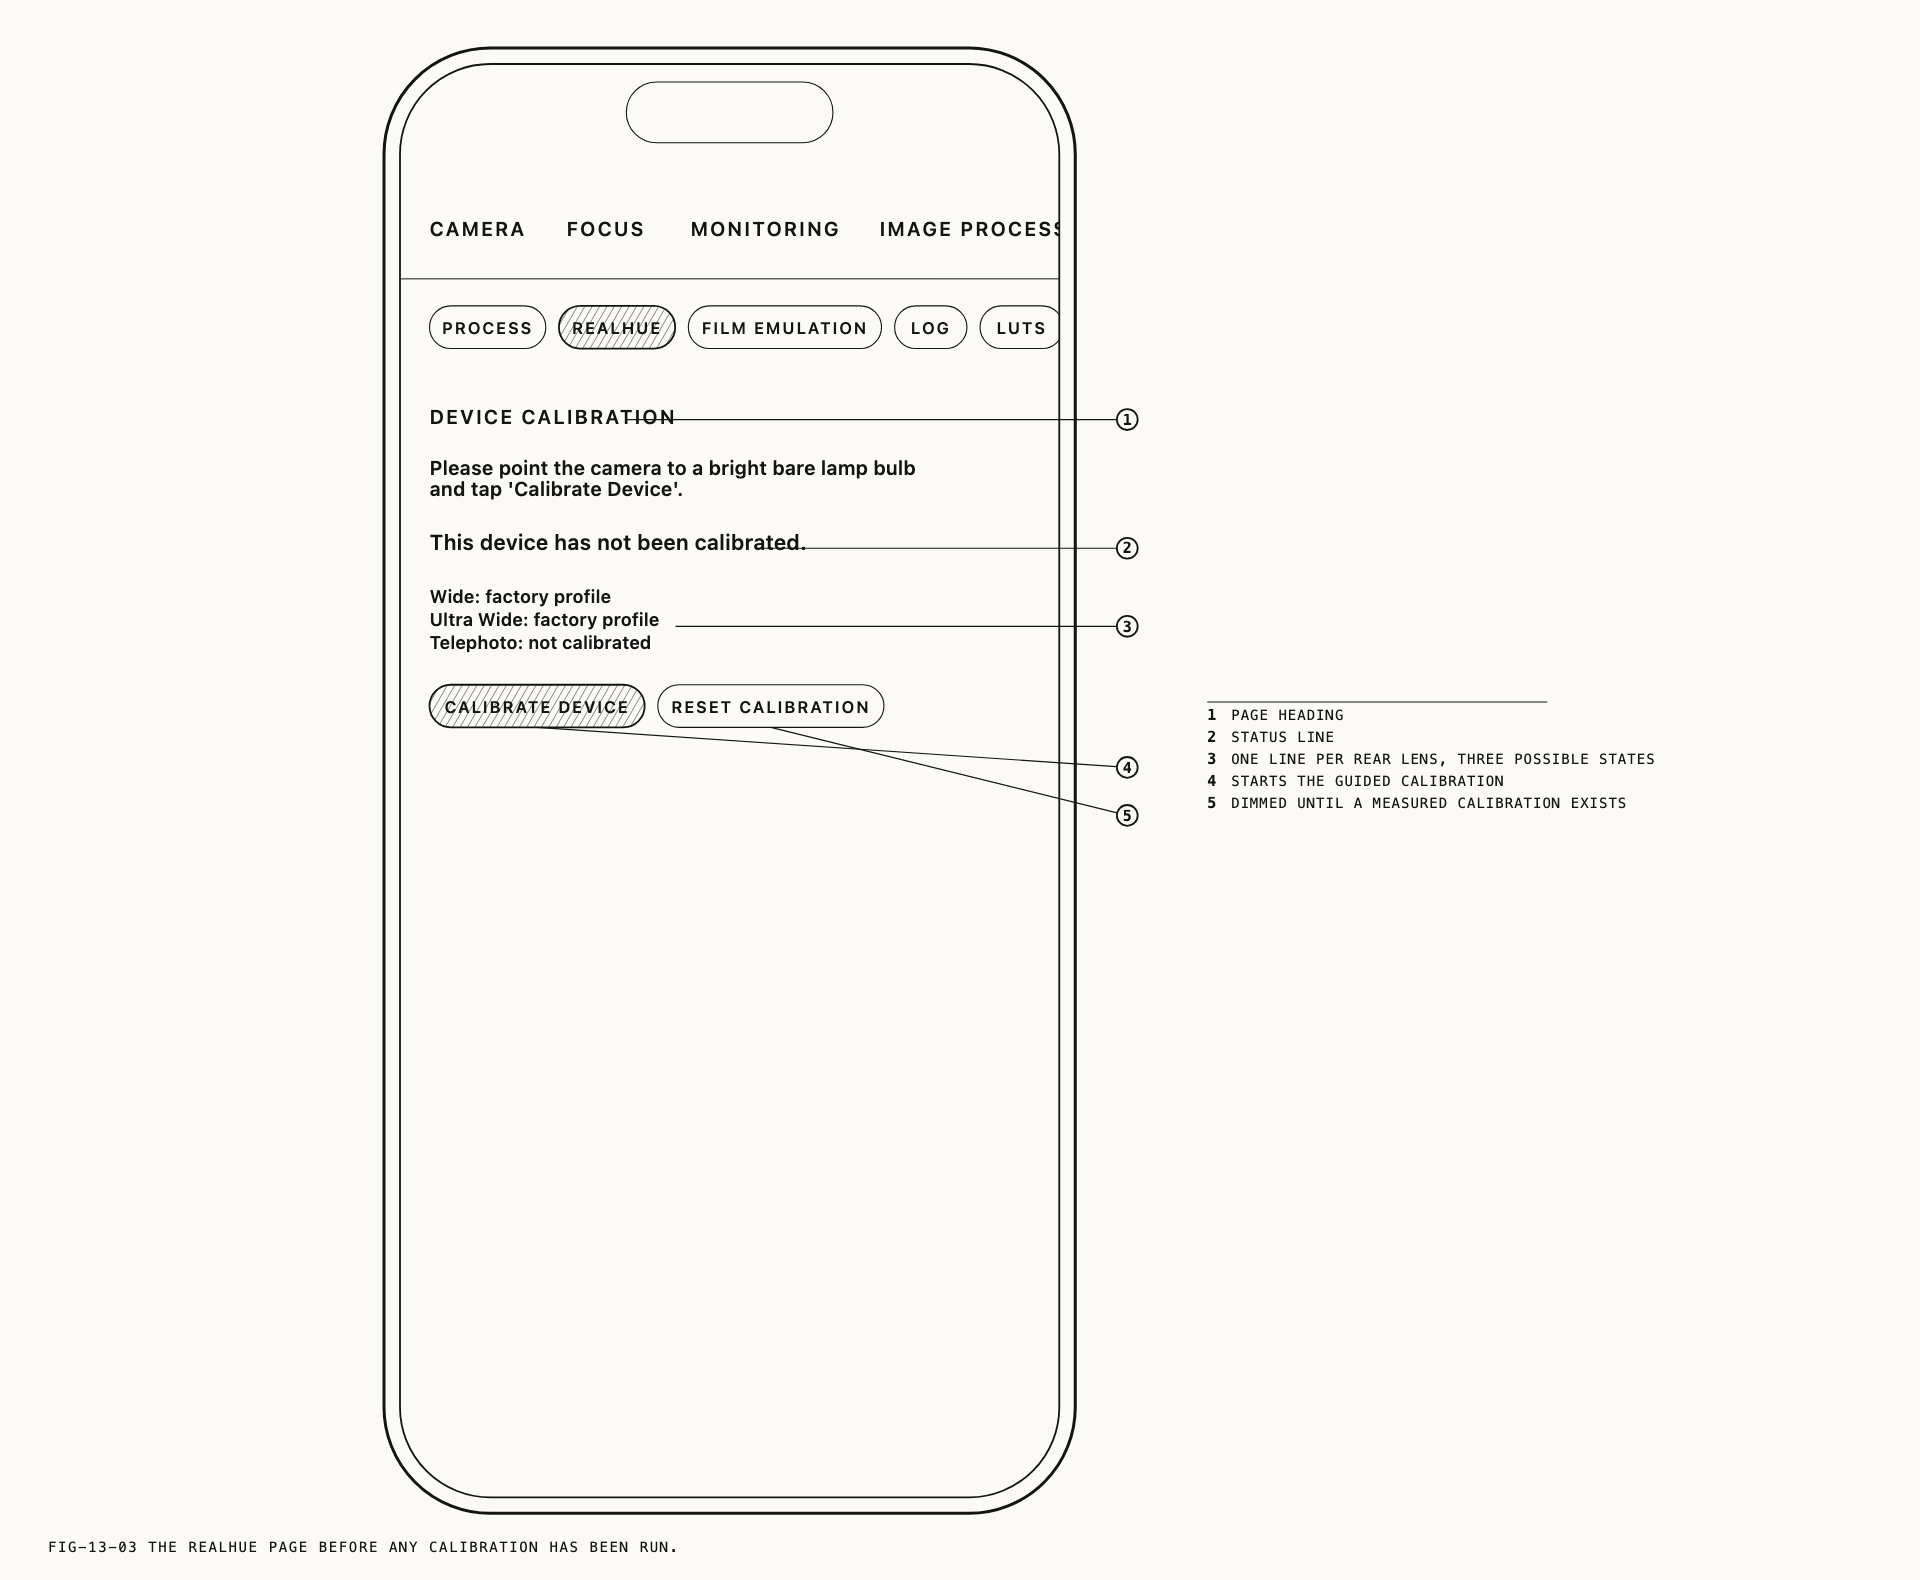
The RealHUE page holds a single section, headed DEVICE CALIBRATION, which tunes
Verana to the individual phone in your hand.
Where to change it: Settings → Image Processing → RealHUE.
The page reports its state at two levels. A status line reads “This device has not been calibrated.” until a calibration exists, after which it names the date the device was last calibrated. Below it, each rear lens is listed by name with its own state, so a device part-way through is readable at a glance.
| Lens state | What the page reads |
|---|---|
| Measured on this device | Wide: calibrated 12 March 2026 |
| Running on the profile it shipped with | Wide: factory profile |
| Never measured | Wide: not calibrated |
Wide, Ultra Wide and Telephoto are listed in that order. Lenses your device does not have are not listed.
Devices measured in-house ship with a factory profile already in place, so calibration is not a prerequisite for shooting. Running it produces a measurement of your own hardware, which is more precise than a profile made for the model in general.
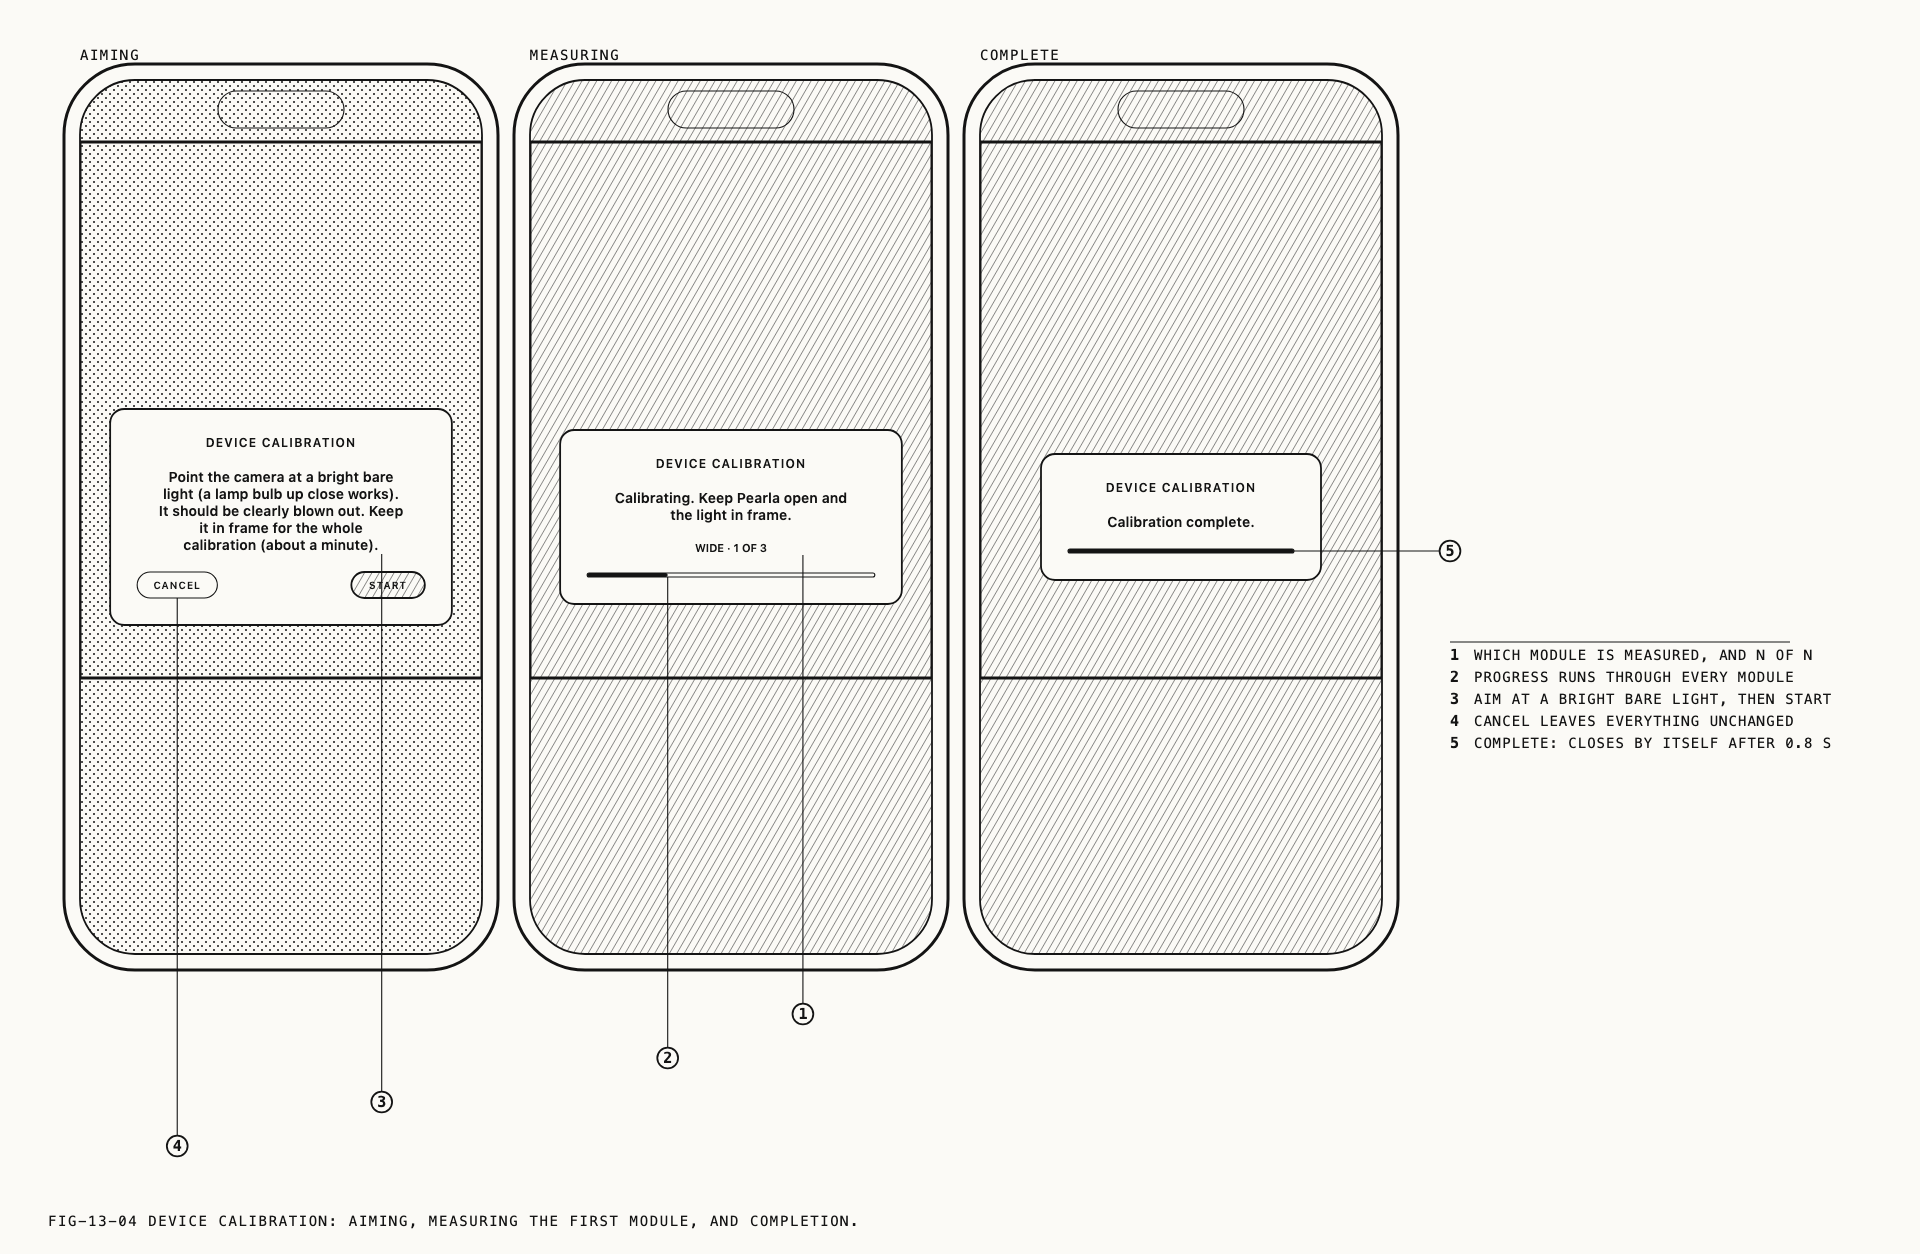
Calibrating. CALIBRATE DEVICE starts a guided sequence. Settings close so that the
viewfinder is visible while you aim, and the app asks you to point the camera at a
bright light source, as the screen directs. Press START and Verana works through each
rear lens in turn, naming the lens it is on and its position in the sequence, with a
progress bar across the whole run. The full sequence takes around a minute. Keep the
light in frame and keep Verana in the foreground for the duration. If the light drifts
out of frame or is no longer bright enough, the run pauses and asks you to re-aim before
resuming.
Note: A major iOS update can move a device away from its measurement. When that happens the page adds the line “iOS was updated since calibration. Re-calibration recommended.” It is advice rather than a requirement, and the existing calibration stays in use until you replace it.
Resetting. RESET CALIBRATION discards the measurement taken on this device and
returns it to the factory defaults. It asks for confirmation first, and it is dimmed
when there is no measured calibration to remove.
13.5 Output Color Space
Color decides how the image is rendered. The color space decides how the finished file is described to whatever opens it next, which is what keeps a picture looking the same outside Verana as it did in the viewfinder. The two settings work together, and they are set in different places: Color on the Image Processing tab, color space with the rest of the capture settings for stills and video.
Choosing a color space, the values available for each, and how a capture reaches a deliverable one are covered in Chapter 14.
Two points that belong here rather than there. A log recording carries its own encoding, so the color space setting does not change what is written to a log file. And Verana records which Color value was in use with every capture, so for Pearla’s own raw formats both that value and the output color space can be chosen again when the file is opened afterwards. A decision made at the shutter is not final. Chapter 19 covers that.
The Process page also carries a border. It is not a color control and is covered in Chapter 6 with the other framing aids.
← 12. Teleprompter · Contents · 14. Pearla Wide Gamut and Color Space →