Verana focuses two ways. Tap the viewfinder and the camera focuses at the point you
name. Select the FOCUS tool and the main dial sets a distance by hand. The two are not
separate modes and you do not switch between them: a tap while the dial holds a manual
distance runs one autofocus pass and hands the result back to the dial, and turning the
dial takes focus back from the tap.
What a tap does is yours to decide. Verana treats it as three separate questions: what a tap drives, what becomes of the point afterwards, and whether a long press latches it. Each is set independently, and each is held separately for photo and for video.
Where to change it: Settings → Focus.
5.1 Tapping the Viewfinder
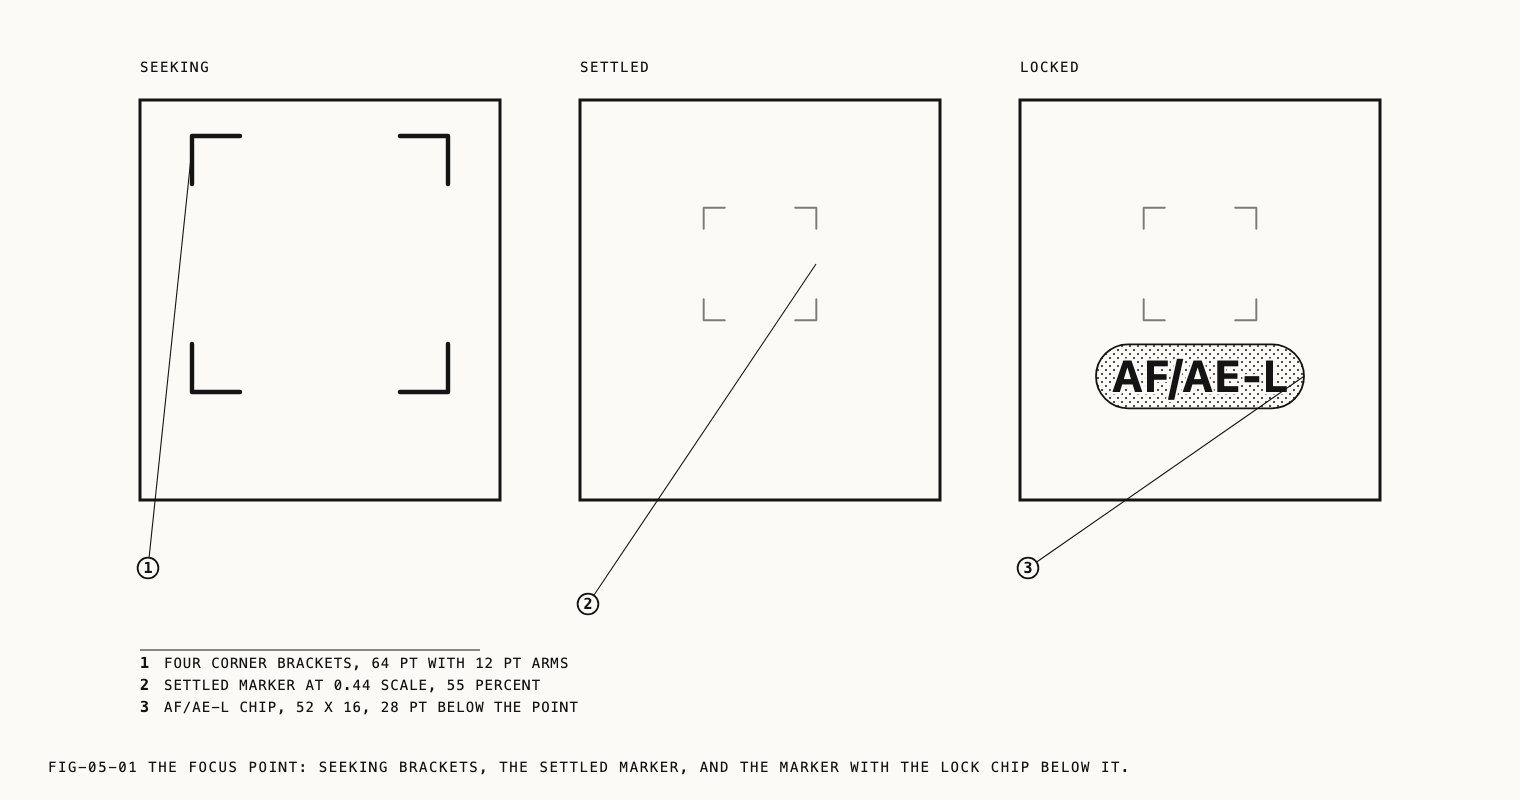
A tap places a focus point. Four corner brackets appear at the point and pulse while the camera focuses, then contract once when focus settles. A light haptic confirms it, suppressed while recording so that it is not picked up by the microphones. If focus cannot be reached the brackets flash red instead of settling, and the camera stays where the attempt left it.
Drag the brackets to move the point. Focus tracks the finger continuously during the drag and runs a fresh pass where you release, so a moving subject can be followed without lifting off and tapping again. Tap a settled point to release it and return the camera to full auto.
A point is also released when you switch lens, when you switch between photo and video,
and when you turn the FOCUS dial. Each of these hands focus to something else, so the
point is cleared rather than left showing a state the camera is no longer in.
The brackets are drawn on the image. A tap shows them in every viewfinder display mode, including Clean, since the tap is your own action and the response to it should not be concealed by a display setting. The marker left behind by a settled point is treated as an overlay and does follow the display mode. Display modes are covered in Chapter 2.
Note: An intervalometer run locks focus for the whole run so that frames do not
drift between exposures. Taps are refused for the duration and the notice
FOCUS LOCKED DURING RUN reports why. Interval runs are covered in Chapter 9.
5.2 Tap Action
Tap Action decides what a viewfinder tap drives.
| Option | Effect |
|---|---|
Off | Taps are ignored. Focus is left to the camera and to the dial |
Focus | A tap sets the focus point only |
Focus + Exposure | A tap sets the focus point and meters the exposure there |
The exposure half of Focus + Exposure applies only where the exposure mode leaves room
for it. In Auto the camera meters at the point. In Shutter priority the shutter you set
is never touched, so the tap steers sensitivity alone. In Manual both values are yours
and the camera changes neither, which the settings page states as the rule
In M mode, tap sets focus only. Exposure modes are covered in Chapter 3.
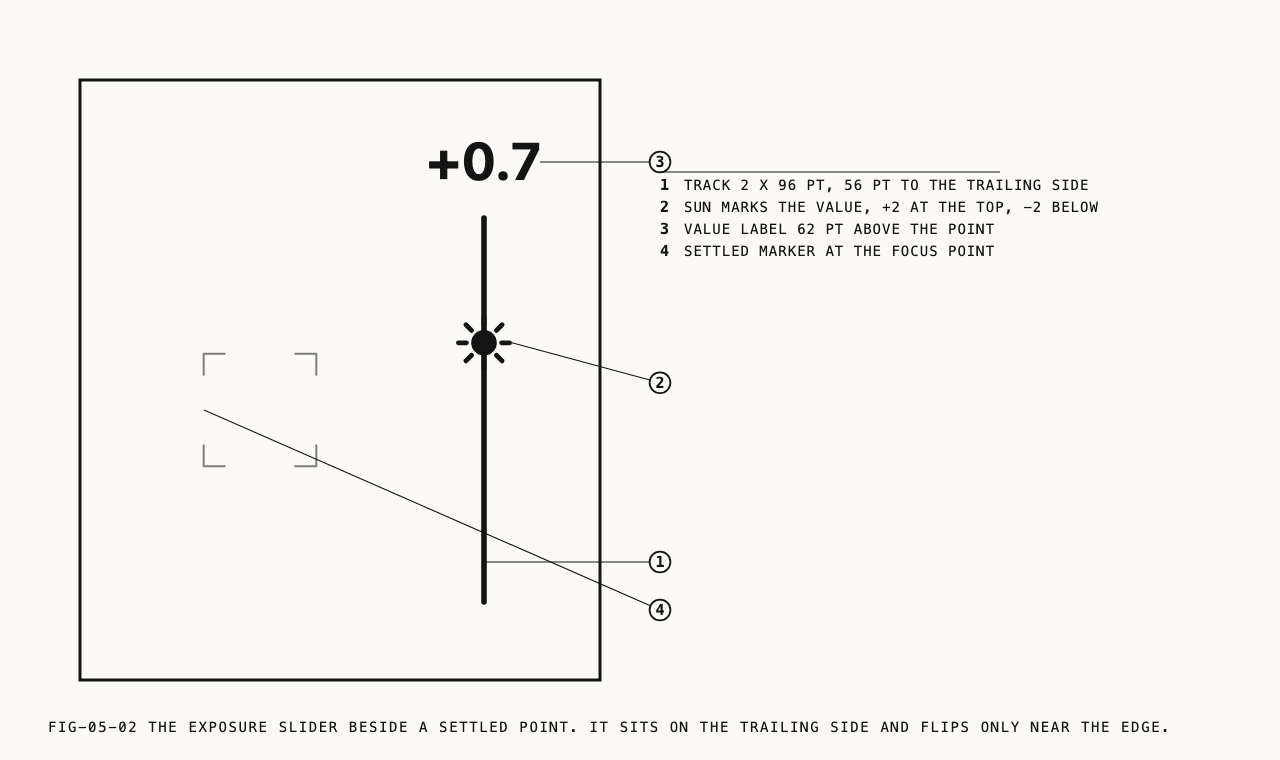
While a tapped point is metering, a small exposure slider appears beside the brackets.
Drag up or down alongside the point to bias the exposure the camera is working toward,
two stops either way. The value is the same exposure compensation the EV tool carries,
so a change made here is shown on the toolbar and survives the point being released. The
slider is offered only while the point is metering. Once exposure has been locked it does
not appear, since there would be nothing for it to move.
5.3 Tap Behavior
Tap Behavior decides what happens to the point after focus settles. The three options
correspond to the ways a camera can treat a focus point, and the right one depends on
whether the subject or the frame is the thing that moves.
| Option | After the tap settles |
|---|---|
Auto Refresh | The point holds until the scene changes, then the camera returns to full auto |
Stay on Point | Focus continues to track at the point until you retarget or release it |
Focus and Lock | The lens locks at the distance it found and stays there |
Auto Refresh is the behavior an iPhone user already has by muscle memory: the tap
corrects the camera for the shot in front of you, and a change of scene hands focus
back. Stay on Point and Focus and Lock are the spot behaviors of a mirrorless
camera, continuous at the point and one-shot respectively. Both leave a small marker at
the point so that a held focus is never silent.
A change to Tap Behavior governs the next tap. A point that is already active keeps the
behavior it was set with.
5.4 Long Press: AF/AE Lock
A long press on the viewfinder focuses at the point and then latches it. The lens locks at the distance it found, and where the exposure component applies, the metered exposure latches with it.
A chip appears below the point reporting what is held. It reads AF/AE-L when focus and
exposure are both latched, and AF-L when only focus is. Exposure can be latched only
where the camera was metering it in the first place. With Tap Action set to Focus, in
Manual, and in Shutter priority, where the camera is still choosing sensitivity, a long
press latches focus alone and the chip reads AF-L.
Tap the point to release the lock.
Where to change it: Settings → Focus, under Long Press: AF/AE Lock.
Turning the setting off leaves the long press unassigned, which is worth doing if you work with the viewfinder against your face and trigger it by accident.
5.5 Face Priority AF
With Face Priority AF on, the camera weights faces in the scene when it focuses
automatically. With it off, autofocus works from the frame and from any point you have
tapped, and a face carries no special claim on it. It is on by default, and it is held
separately for photo and video.
The setting applies to automatic focus. It has no effect on a distance set by hand on the dial.
5.6 AF Speed
AF Speed sets how autofocus moves between distances during video.
| Option | Character |
|---|---|
Smooth | Slow, even transitions, the way a focus pull is made |
Fast | Quick scans, the way a stills camera acquires |
Smooth is the default, because a visible focus move belongs to the shot in video while
a fast scan calls attention to itself. The control appears in video settings only. Photo
capture always focuses fast, where the scan is over before the frame is taken and there
is nothing to see.
5.7 Manual Focus on the Dial
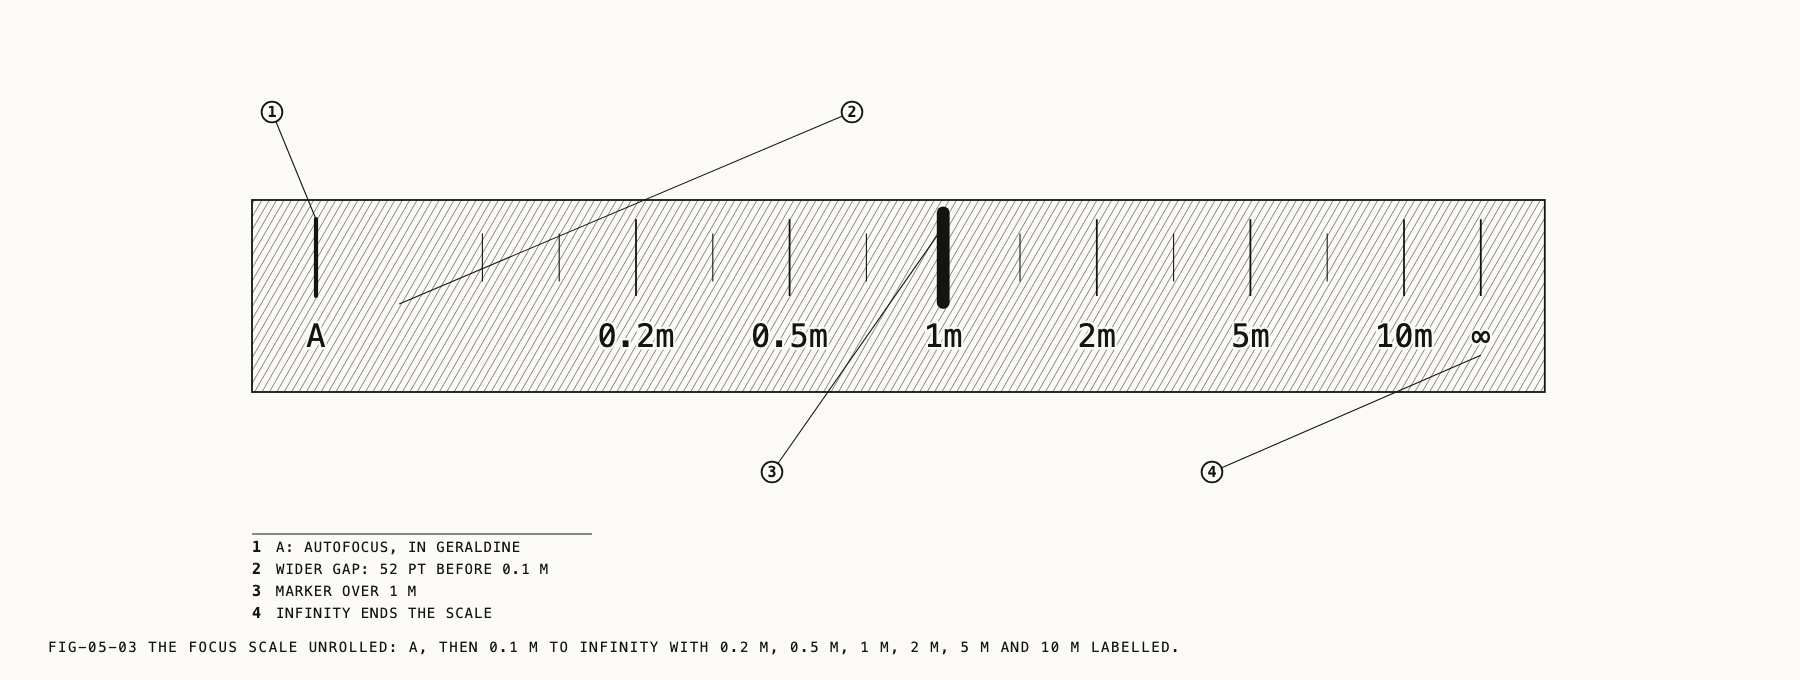
Select FOCUS on the toolbar and the main dial reads focus distance in meters. The scale
runs from an A position at one end, through the marked distances 0.2 m, 0.5 m, 1 m, 2 m,
5 m and 10 m, to ∞. Minor ticks fall between the marked ones, divided more finely at
the near end of the scale, where a small change of distance makes the larger difference.
A returns focus to the camera. Any other position locks the lens at that distance and
holds it there, and the toolbar shows the distance with a gold M badge beside the tool
name to report that focus is yours rather than the camera’s. Chapter 2 covers the badge.
The distances on the scale are approximate rather than calibrated optical measurements, so treat them as a repeatable reference rather than a measurement. Each lens is scaled to its own reach, and how close a lens can focus varies: a distance nearer than the lens can reach settles at its closest point.
Tapping the viewfinder while the dial holds a manual distance does not hand focus back to the camera. It runs one autofocus pass at the point you tapped, locks the lens at the result, and moves the dial to the distance it found. This is the fastest way to set a manual distance: focus on the subject with a tap, then trim on the dial from there.
Focus peaking marks what is sharp in the viewfinder and is the practical aid to setting focus by hand. It is covered in Chapter 6.
5.8 Lenses With Fixed Focus
Several iPhone ultra wide and front cameras focus at a fixed distance and have no focus
control at all: no autofocus and no settable lens position. On those lenses Verana grays
out the FOCUS tool rather than presenting a dial that has no effect, and if FOCUS was
the selected tool when you switched to such a lens, the dial falls back to another tool
the mode is using.
A viewfinder tap on a fixed-focus lens still meters. There is no focus to set, so the tap sets exposure at the tapped point, following the Tap Behavior setting with the focus half left out. The point marker appears where you tapped, as it does on any other lens.
Which lenses focus and which do not depends on your device. Everything else in this chapter applies to the lenses that focus.
← 4. White Balance and Tint · Contents · 6. Framing and Monitoring →